User Management
The User Management page in the DigiSquares platform allows administrators to manage user accounts, assign roles, and update user information. The interface is designed for easy navigation, with options to view, edit, delete, and create new users within a project.

Key Features of the User Management Page
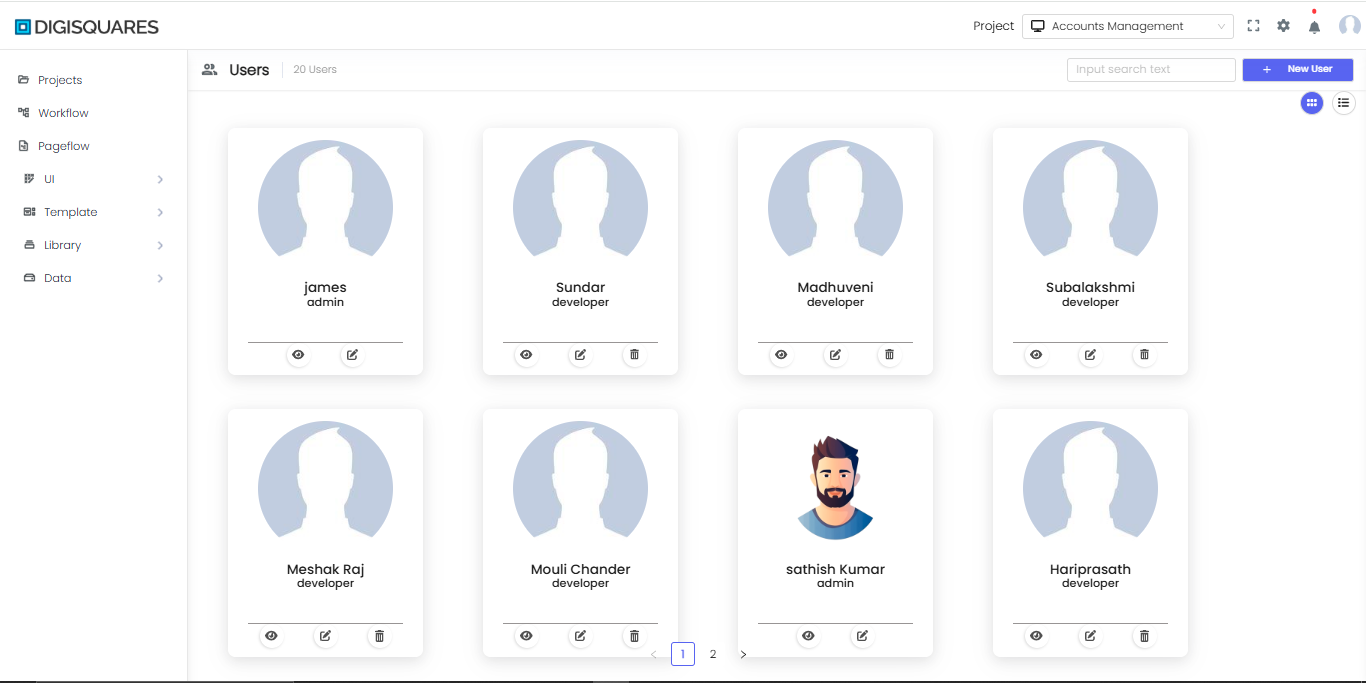
User List View
Users are displayed in a card layout, with each card representing an individual user.
Action Icons
Each user card includes icons for managing that user:
- View: Access detailed information about the user’s profile and activity.
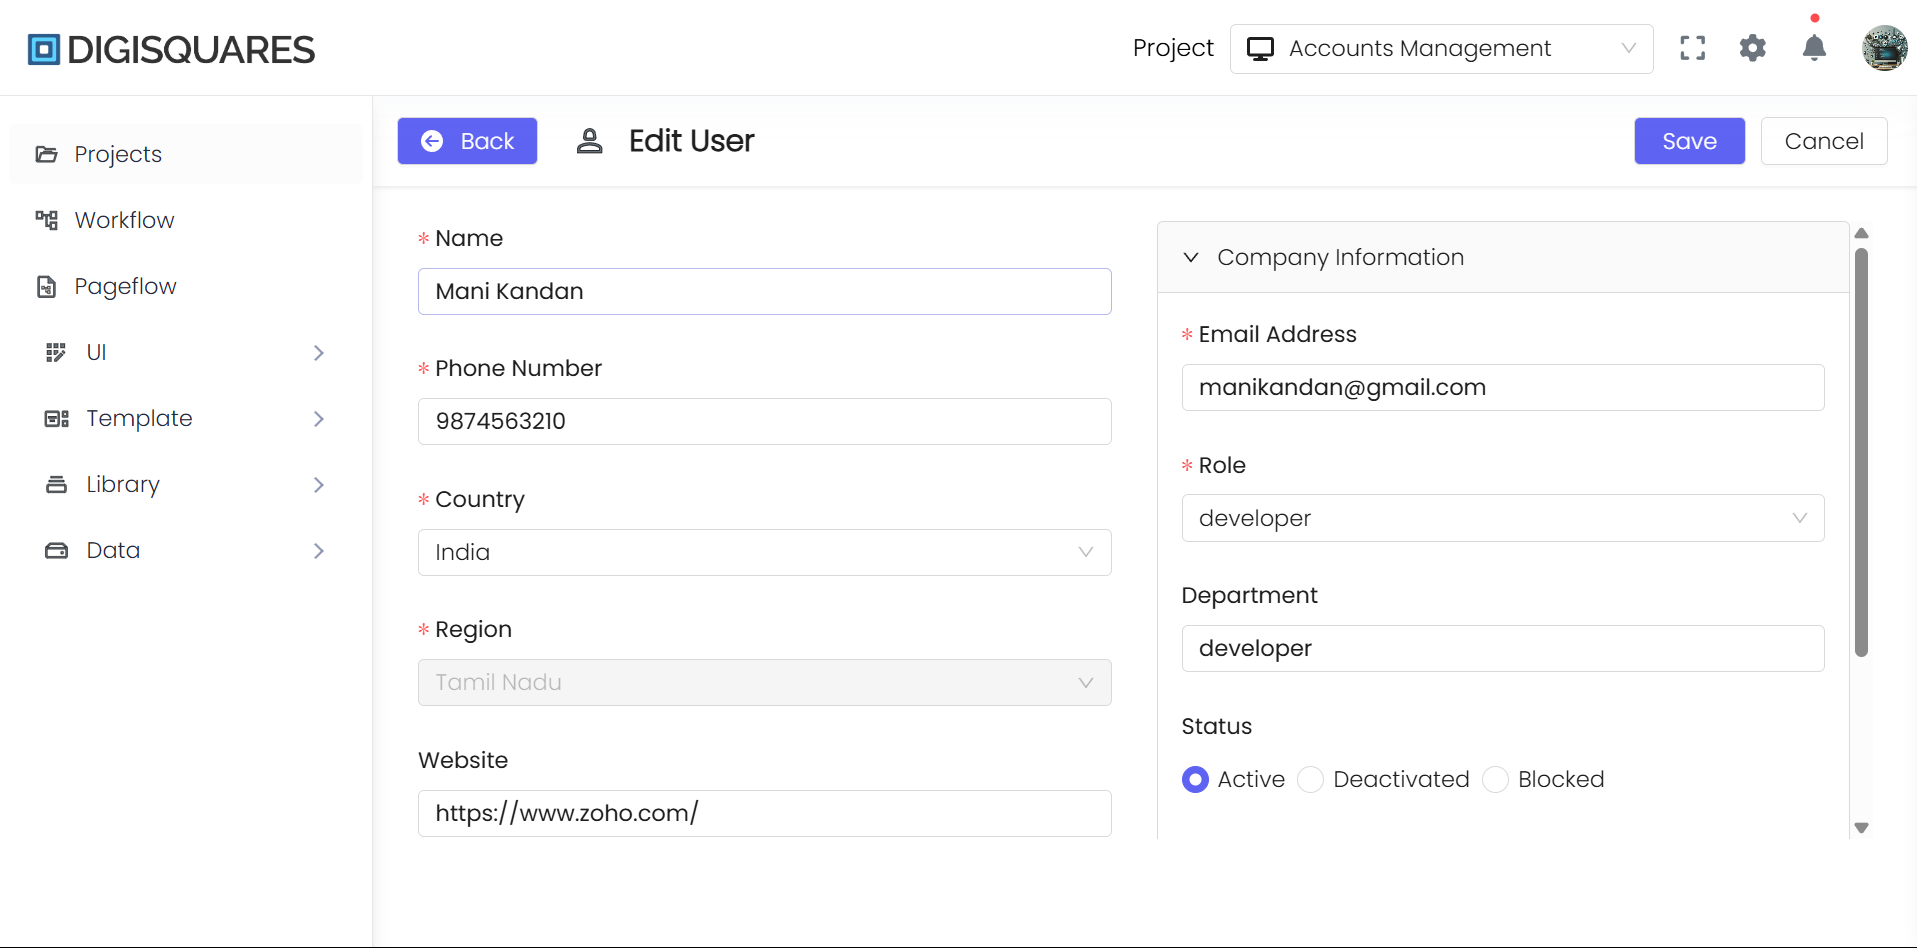
- Edit: Modify user details (e.g., email, role, contact info).
- Delete: Remove the user from the system. A confirmation dialog usually appears before finalizing this action.
Search and Add User
- Search Bar: Located at the top right. Admins can type in a user’s name (or other identifying info) to filter the user list in real time.
- New User Button: The + New User button allows administrators to add new users to the project. Clicking this button opens a form where the admin can enter user details and assign a role.
Example Chart Visualizations
Here are some example visualizations created using Digisquares:
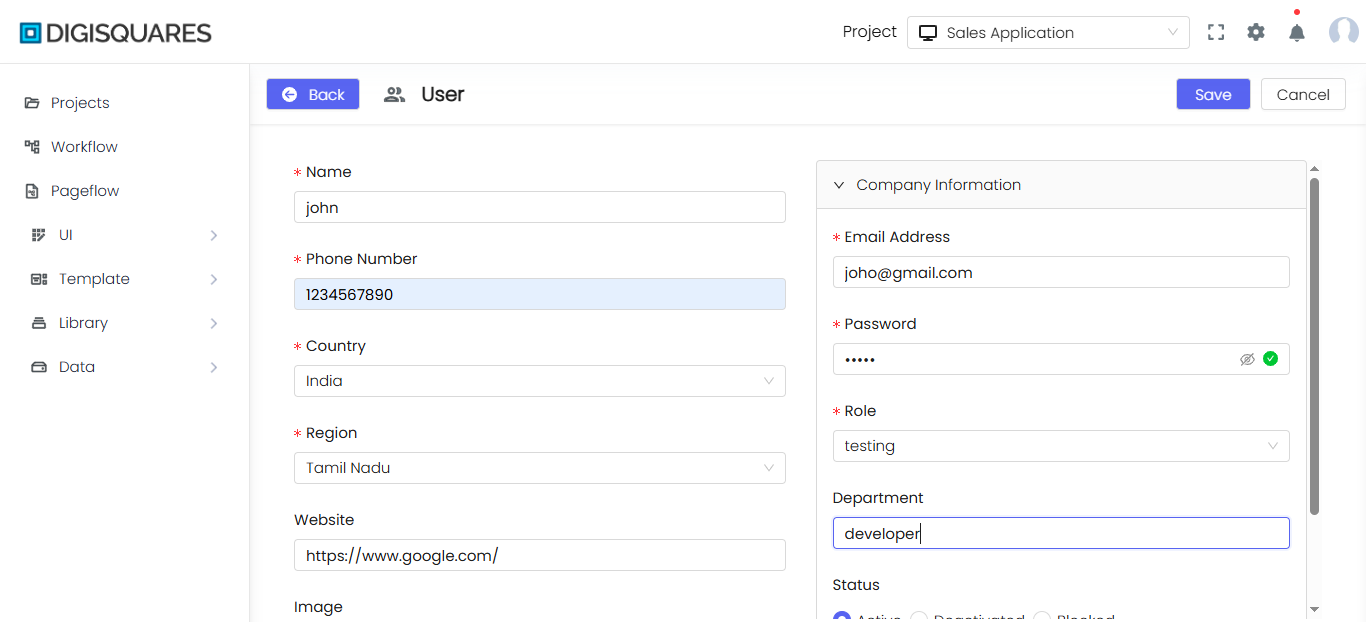

New User Creation
When you click + New User, you’re taken to the New Project User page, where you can create a user profile by entering the required information and assigning roles. The form is divided into multiple sections to organize data entry.
User Information Section
- First Name: The user’s first name (required).
- Display Name: The name shown on the platform (can differ from the first name).
- Phone Number: Contact number for communication.
- Country: A dropdown for selecting the user’s country of residence.
- Region: Specifies the user’s regional location within their country.
Company Information Section
- Email Address: Required field used as the user’s login ID.
- Password: The user’s password for accessing the platform.
- Role: A dropdown for selecting the user’s role (e.g.,
admin,developer,tester). - Department: Indicates the department the user belongs to within the company.
Social Media Information Section (Optional)
- Facebook, Twitter, LinkedIn, Instagram, GitHub, YouTube: Links to the user’s social media profiles. These can help foster external collaboration or networking.
Status Section
- Active: The user has full access to the platform.
- Deactivated: The account is disabled but can be reactivated later if needed.
- Blocked: The user is restricted from accessing the platform entirely.
Upload Profile Picture
An option to Upload Image is available for adding a profile picture. If an image is uploaded, it replaces the default avatar in the User Management view.
Conclusion
The User Management page and New User Creation process in DigiSquares offer a streamlined approach for administrators to maintain user accounts. By centralizing user information, role assignments, and status updates, the platform ensures that team management remains both efficient and secure.
Benefits of User Management
User Management Benefits:
- Streamlined User Access: Quickly grant or revoke user permissions.
- Enhanced Security: Adjust user roles and statuses to reduce unauthorized access.
- Centralized User Data: Keep all user details in one place, simplifying oversight and updates.
Tips for Administrators
- Complete Required Fields: Make sure all required fields are filled out when creating or editing a user.
- Regularly Review Roles: Periodically confirm that user roles and statuses align with current responsibilities.
- Update Contact Info: Keep user phone numbers and email addresses current to maintain effective communication.
By keeping user details accurate and up-to-date, administrators can ensure a secure, organized, and productive environment on the DigiSquares platform.