Pages Feature Overview
The Pages feature in Digisquares allows users to create, manage, and customize application user interfaces (UI) effortlessly. This feature provides a structured and interactive way to design pages, ensuring an efficient workflow for developers and non-developers.
Why Introduce This Feature?
1. Simplified UI Development
- Eliminates the need for complex coding when designing application pages.
- Provides an intuitive drag-and-drop interface for faster UI creation.
2. Standardized Page Creation
- Ensures design consistency across all application pages.
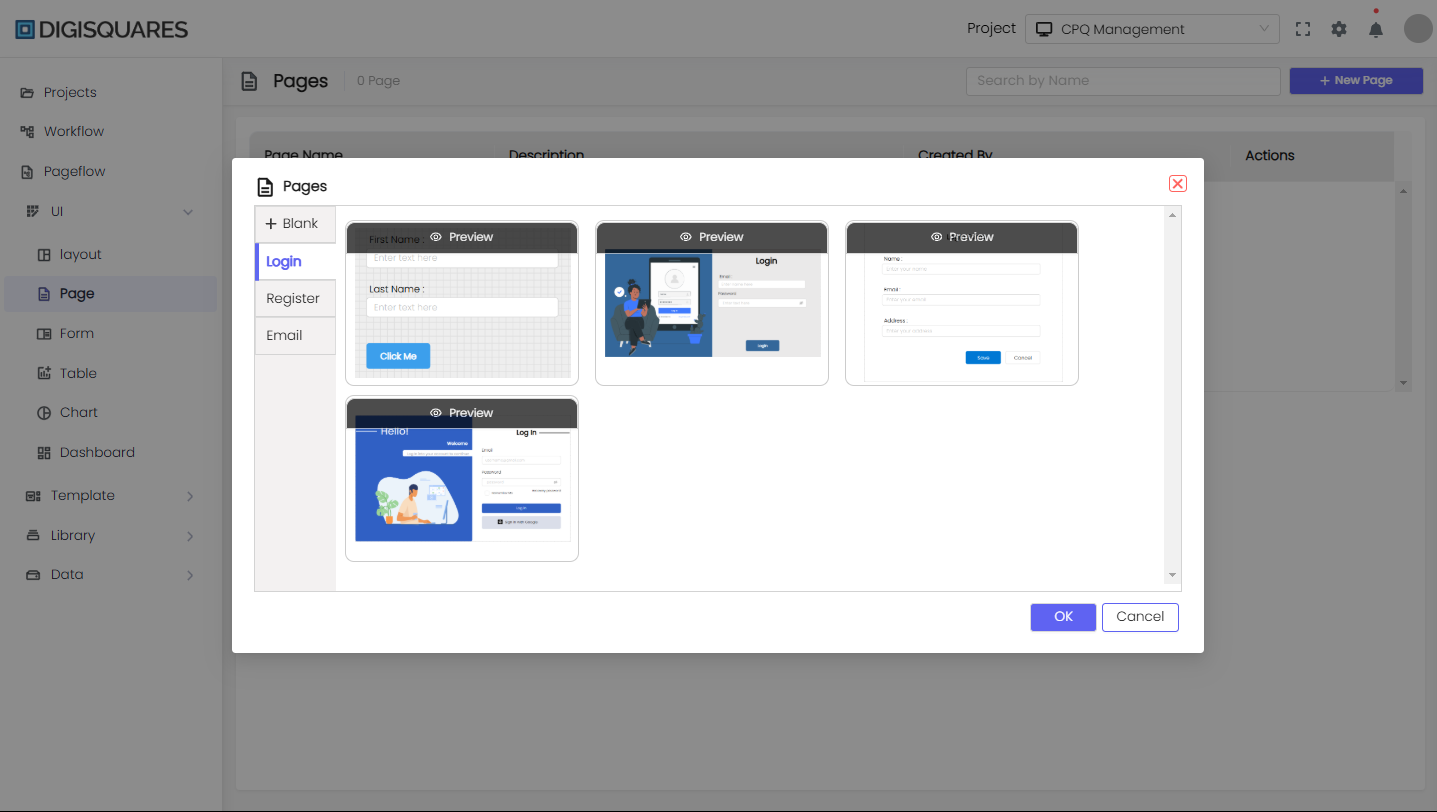
- Offers predefined templates (Login, Register, Email) for quick setup.
3. Customization and Flexibility
- Allows users to start with a blank template for full customization.
- Supports a wide range of UI components (buttons, text fields, dropdowns, modals).
4. User-Friendly Interface for Page Design
- The Page Designer provides:
- Drag-and-drop UI components.
- Adjustable properties like size, color, and layout.
- A structured Component Panel categorizes UI elements for easy access.
5. Real-Time Editing and Preview
- Users can instantly preview changes to their pages.
- Provides Save and Publish options to finalize pages.
6. Scalability and Maintainability
- Ensures pages can be easily modified and expanded as applications grow.
- Allows creation of reusable UI components for consistency.
Where This Feature is Useful
- Application Builders: For designing UI screens without coding.
- Admin Dashboards: To manage settings, reports, and configurations.
- E-commerce Platforms: To create checkout pages, product pages, and profile pages.
- Customer Portals: To build interactive user dashboards.
- Enterprise Software: To streamline internal workflows with structured UI components.
Key Functionalities and Purpose
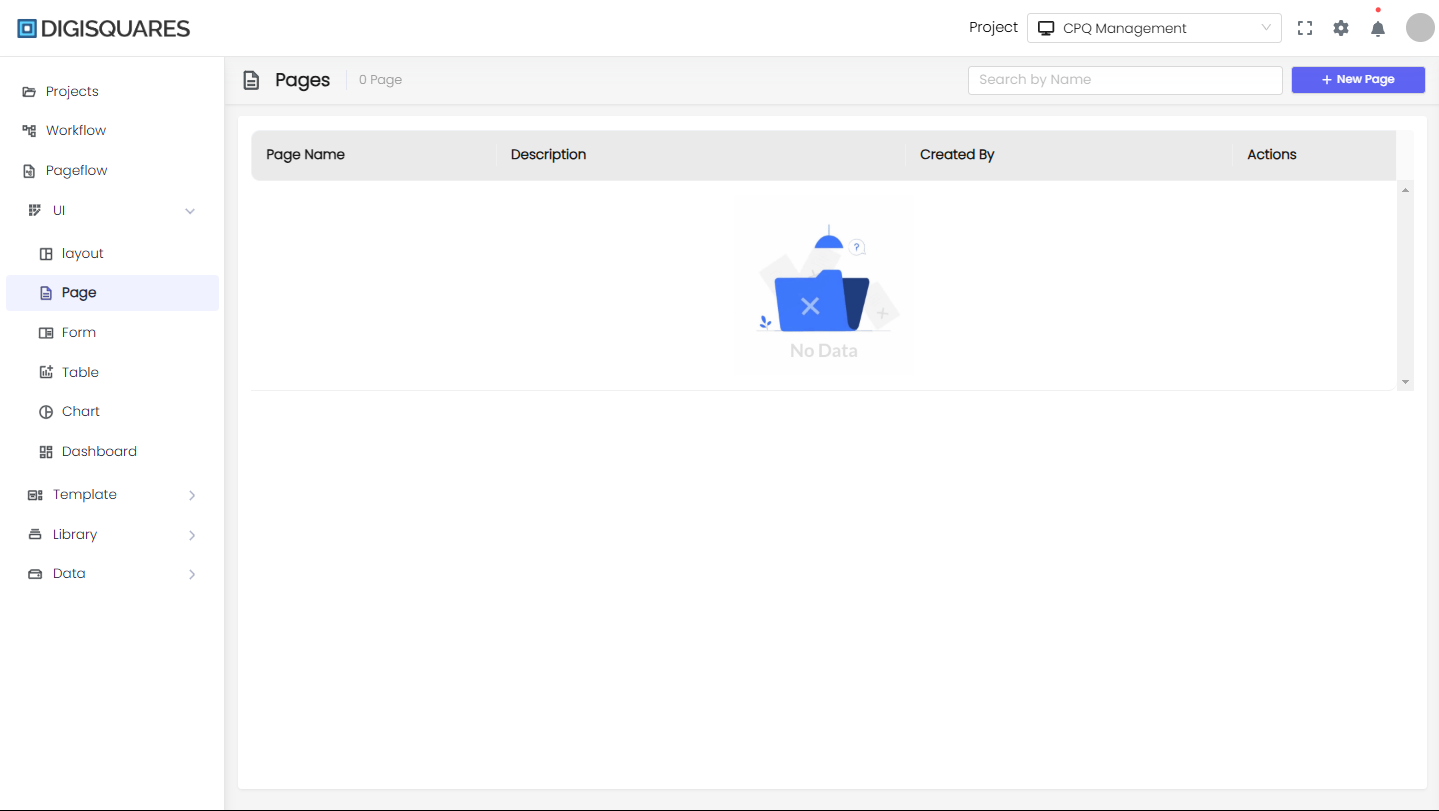
1. Accessing the Page Menu
- Navigate to Digisquares and log in.
- Open the Page Menu from the sidebar.
- Click + New Page to start creating.
2. Selecting a Page Template
- Choose between a blank template or predefined templates (Login, Register, Email).
- Templates save time and maintain design consistency.
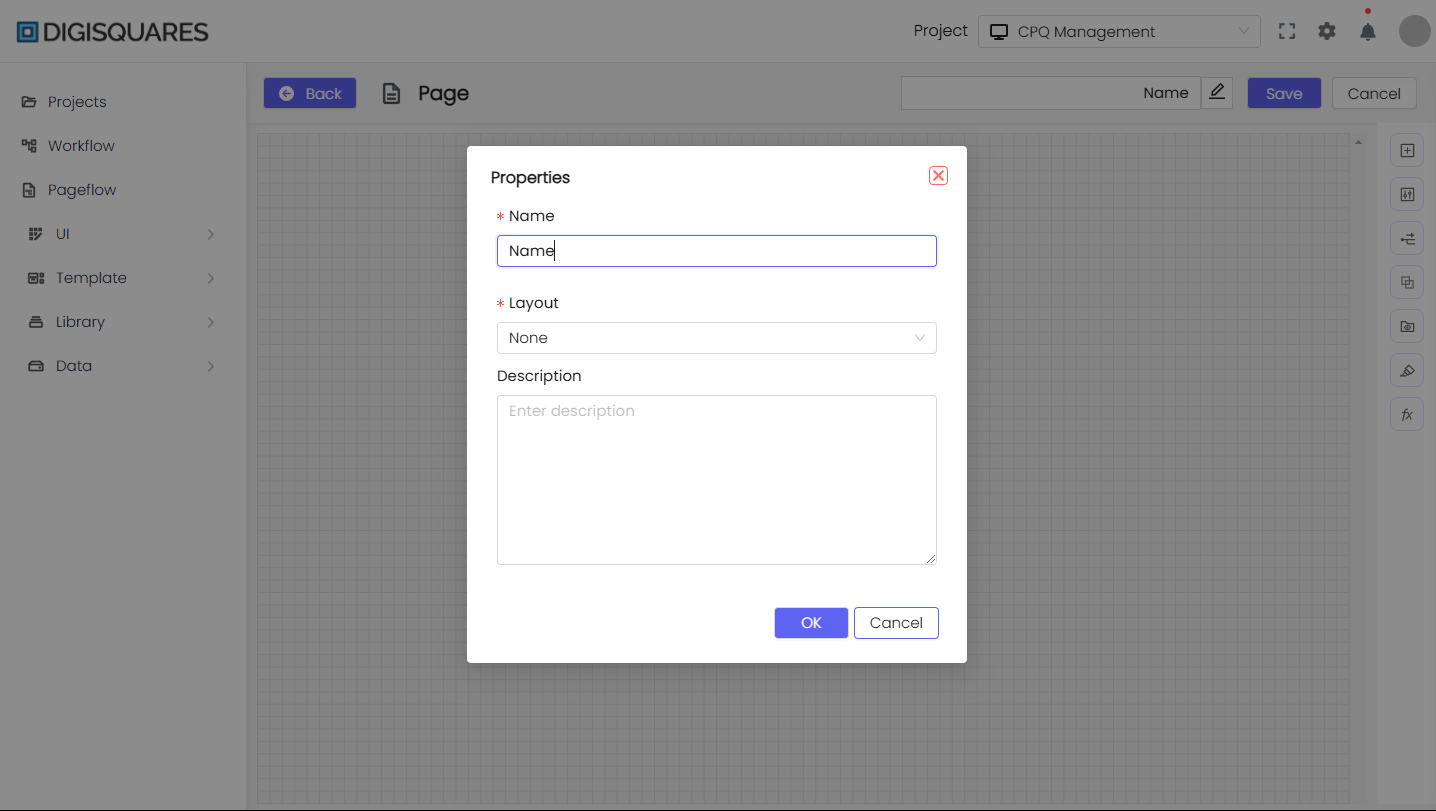
3. Setting Page Properties
- Define a Page Name.
- Select a Layout (if applicable).
- Provide an optional Description.
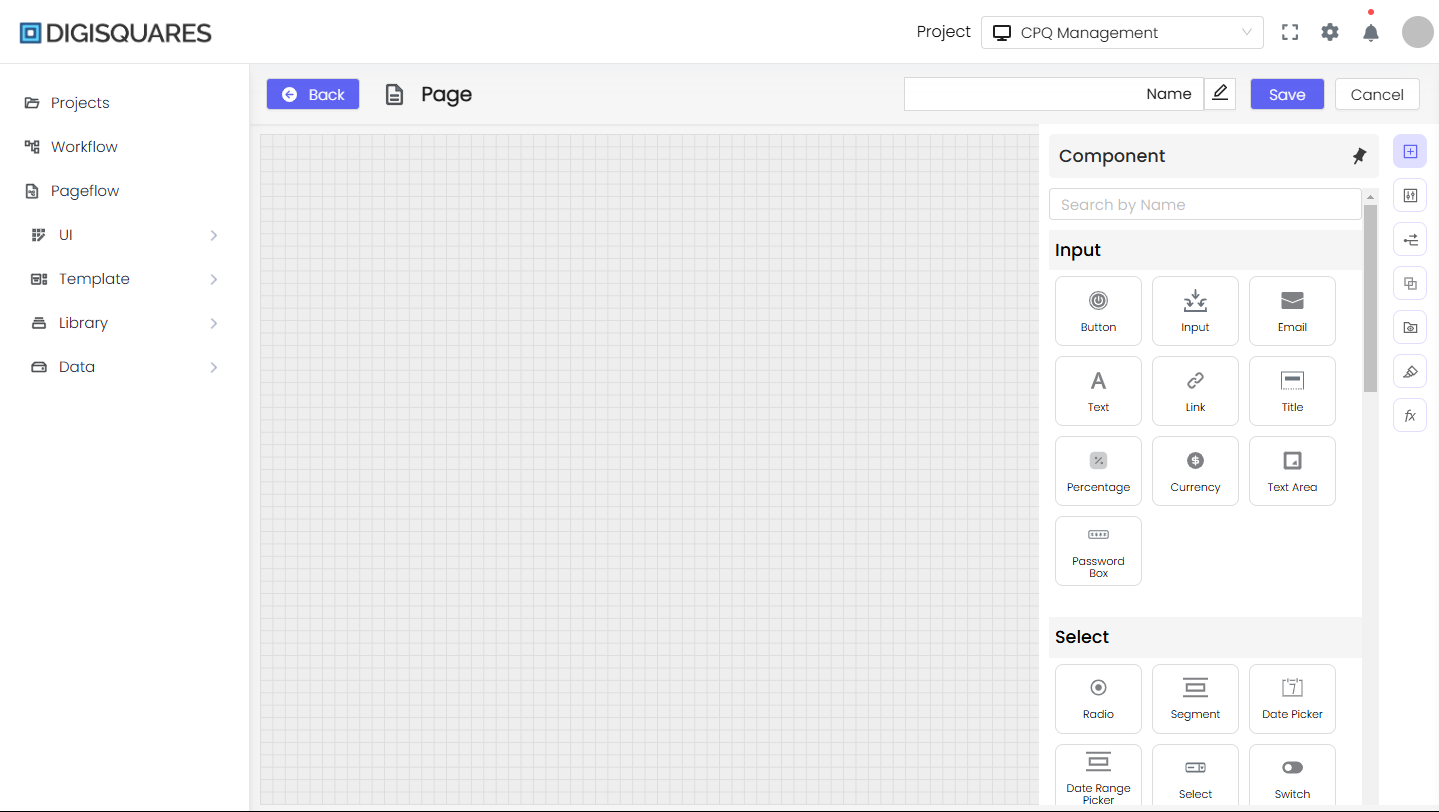
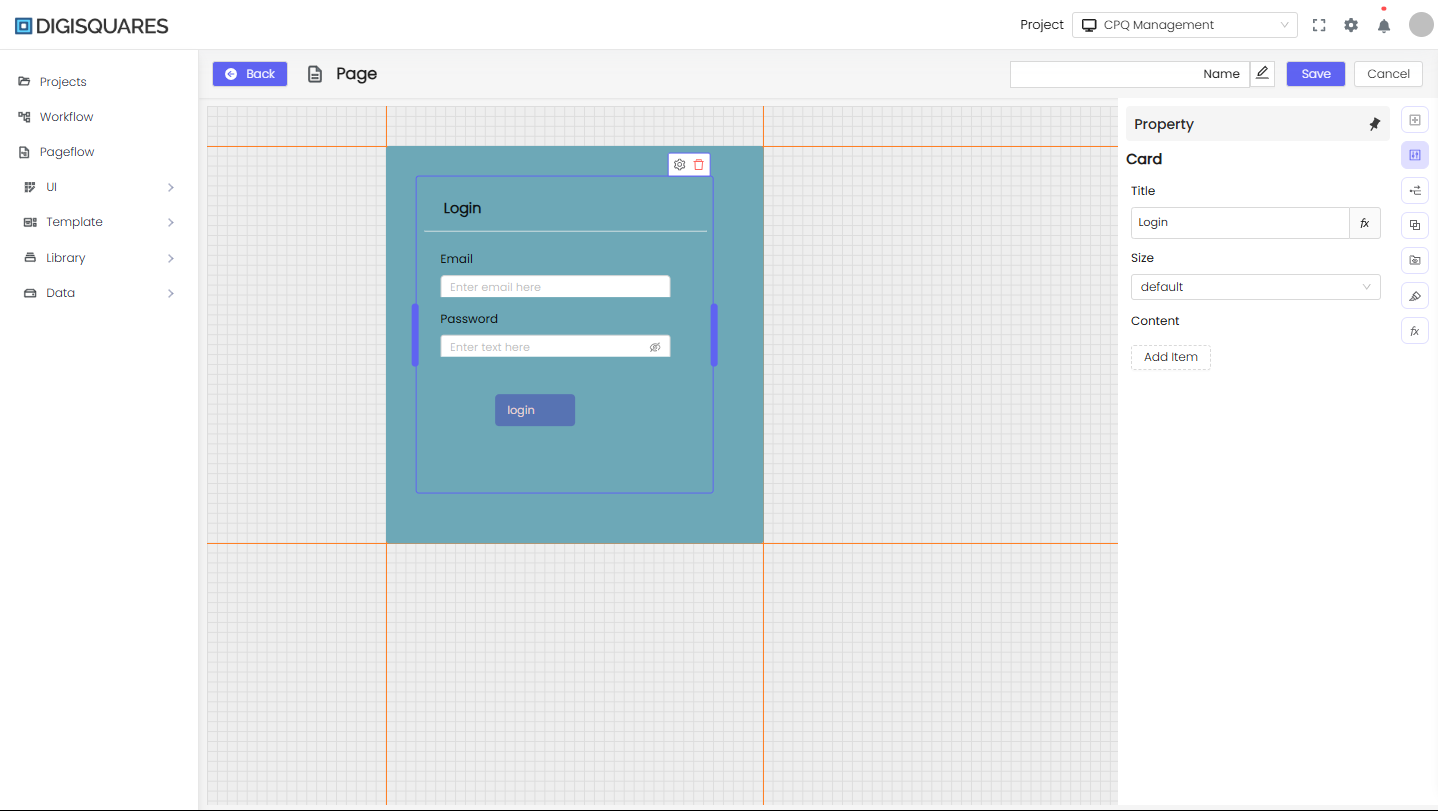
4. Designing the Page
- The drag-and-drop interface allows users to:
- Select UI components from the sidebar.
- Drop components onto the grid-based canvas.
- Configure components (text, styles, and layout adjustments).
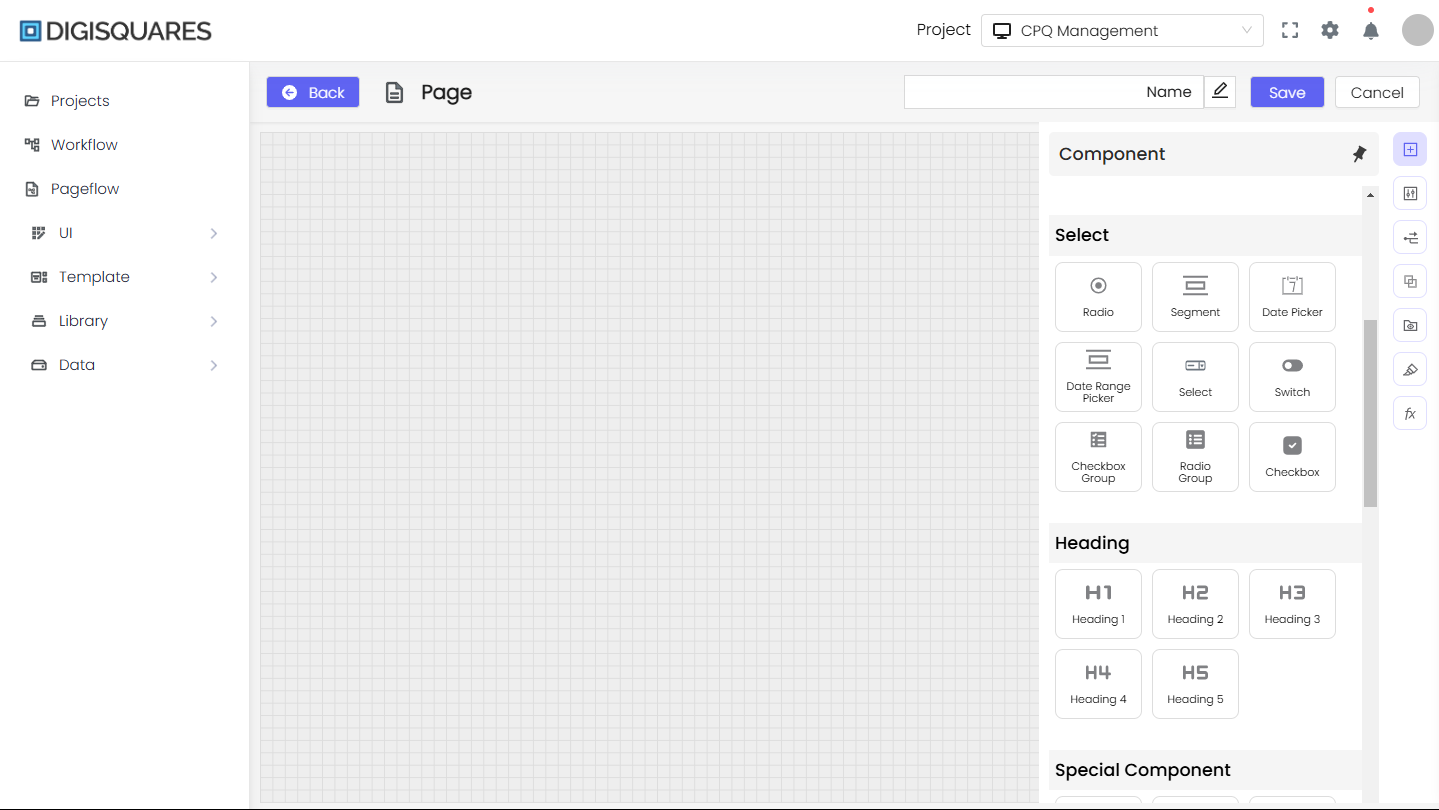
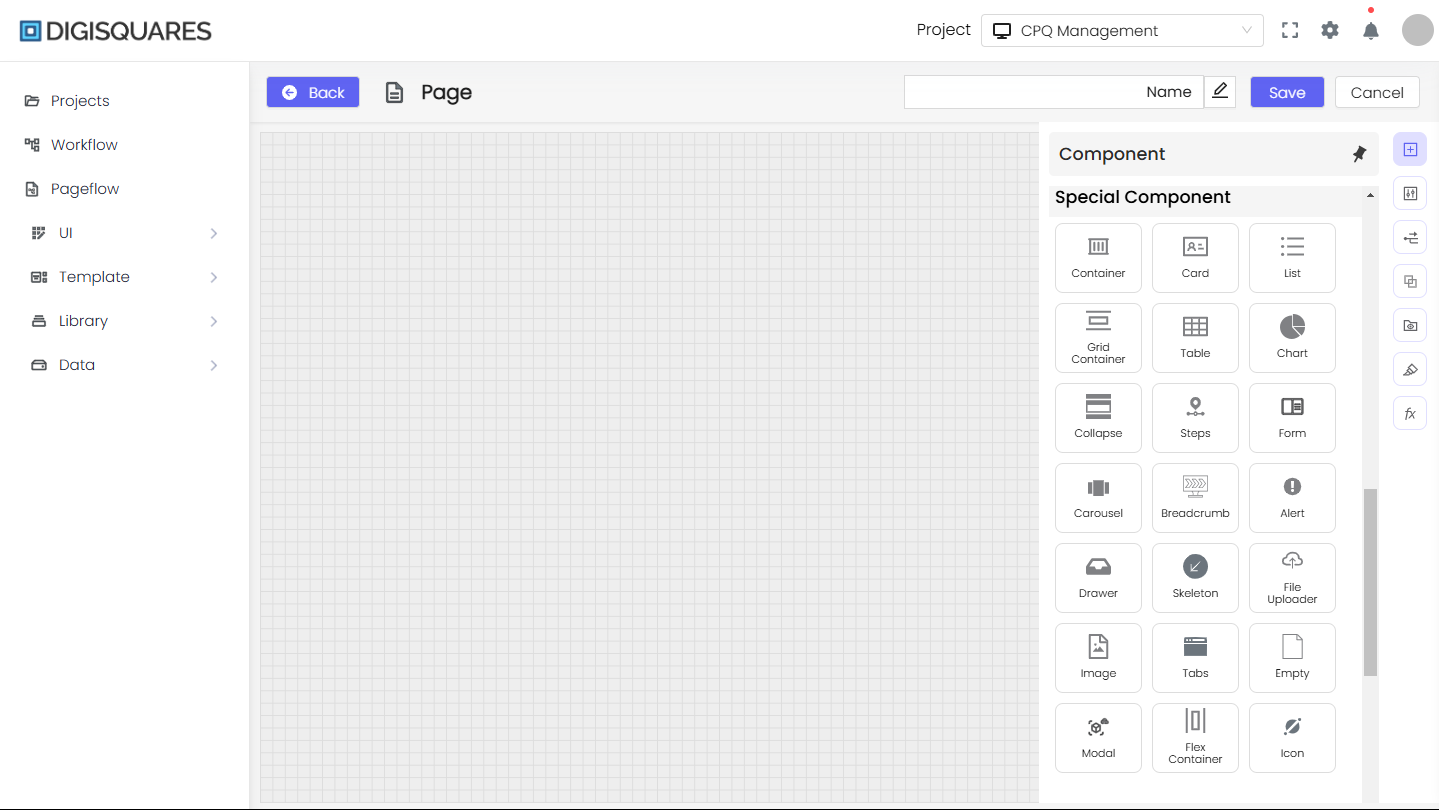
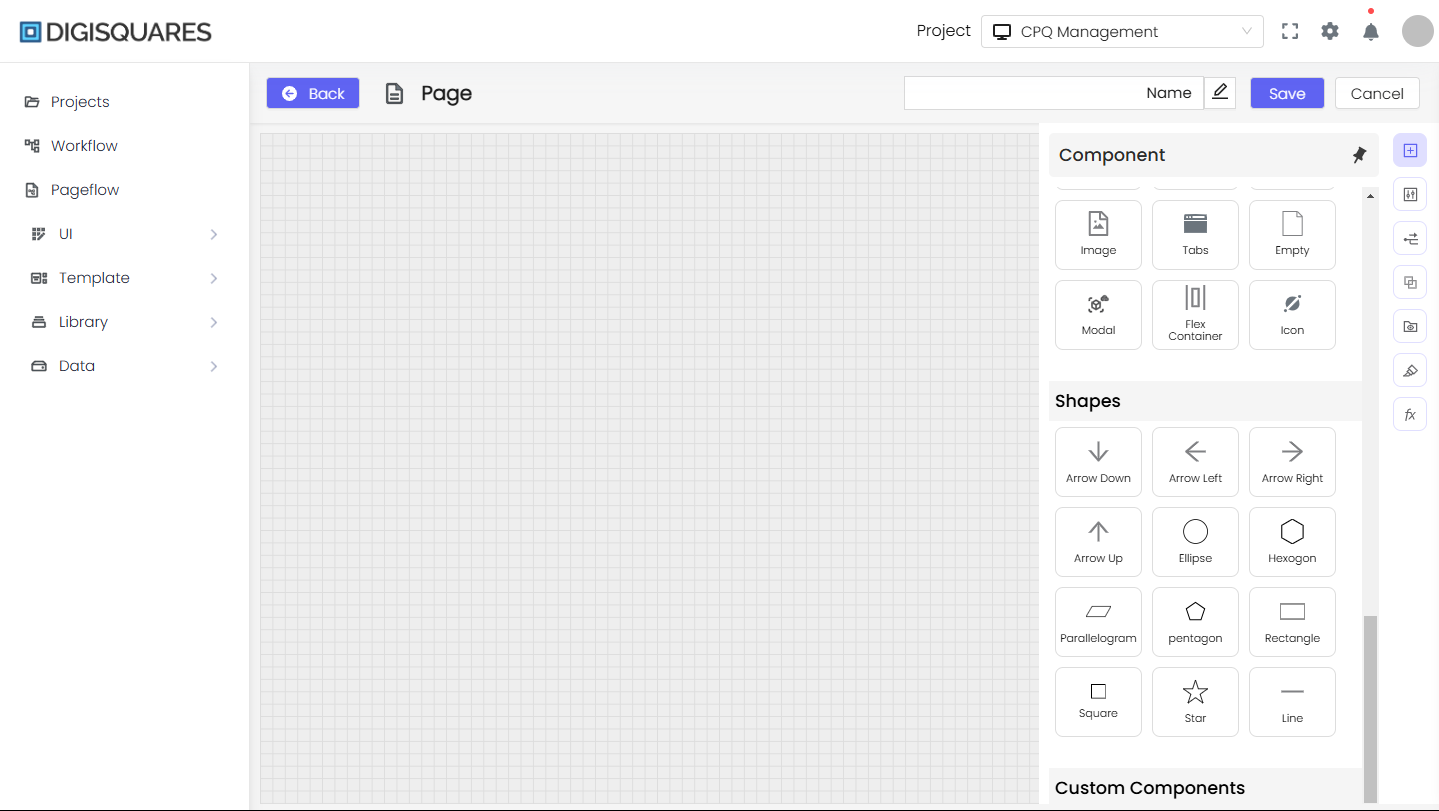
5. Using the Component Panel
The Component Panel provides structured UI elements:
- Input Elements: Buttons, text fields, email, links, text area.
- Selection Elements: Radio buttons, dropdowns, switches, date pickers.
- Heading Elements: H1, H2, H3, H4, H5.
- Special Components: Forms, charts, containers, modals, skeletons.
- Shapes: Arrows, circles, hexagons, stars, rectangles.
6. Editing Page Content
- Click on any component to open the Property Panel.
- Modify text, colors, sizes, and layout settings.
- Add or remove elements using the right toolbar.
7. Preview and Publish
- Click Preview to see how the page will look.
- Click Save to store the page for further editing.
- Click Publish to make the page live.
Visual Guidance
The documentation includes:
- Interactive Images to demonstrate each step.
- Tooltips to provide quick instructions.
- Sliders for step-by-step page creation visuals.
These elements ensure that users can easily understand and apply the instructions.
Conclusion
With Digisquares, users can design, customize, and manage pages efficiently. This feature provides an intuitive way to create structured UI layouts without requiring advanced coding skills. 🚀